Sources Guide
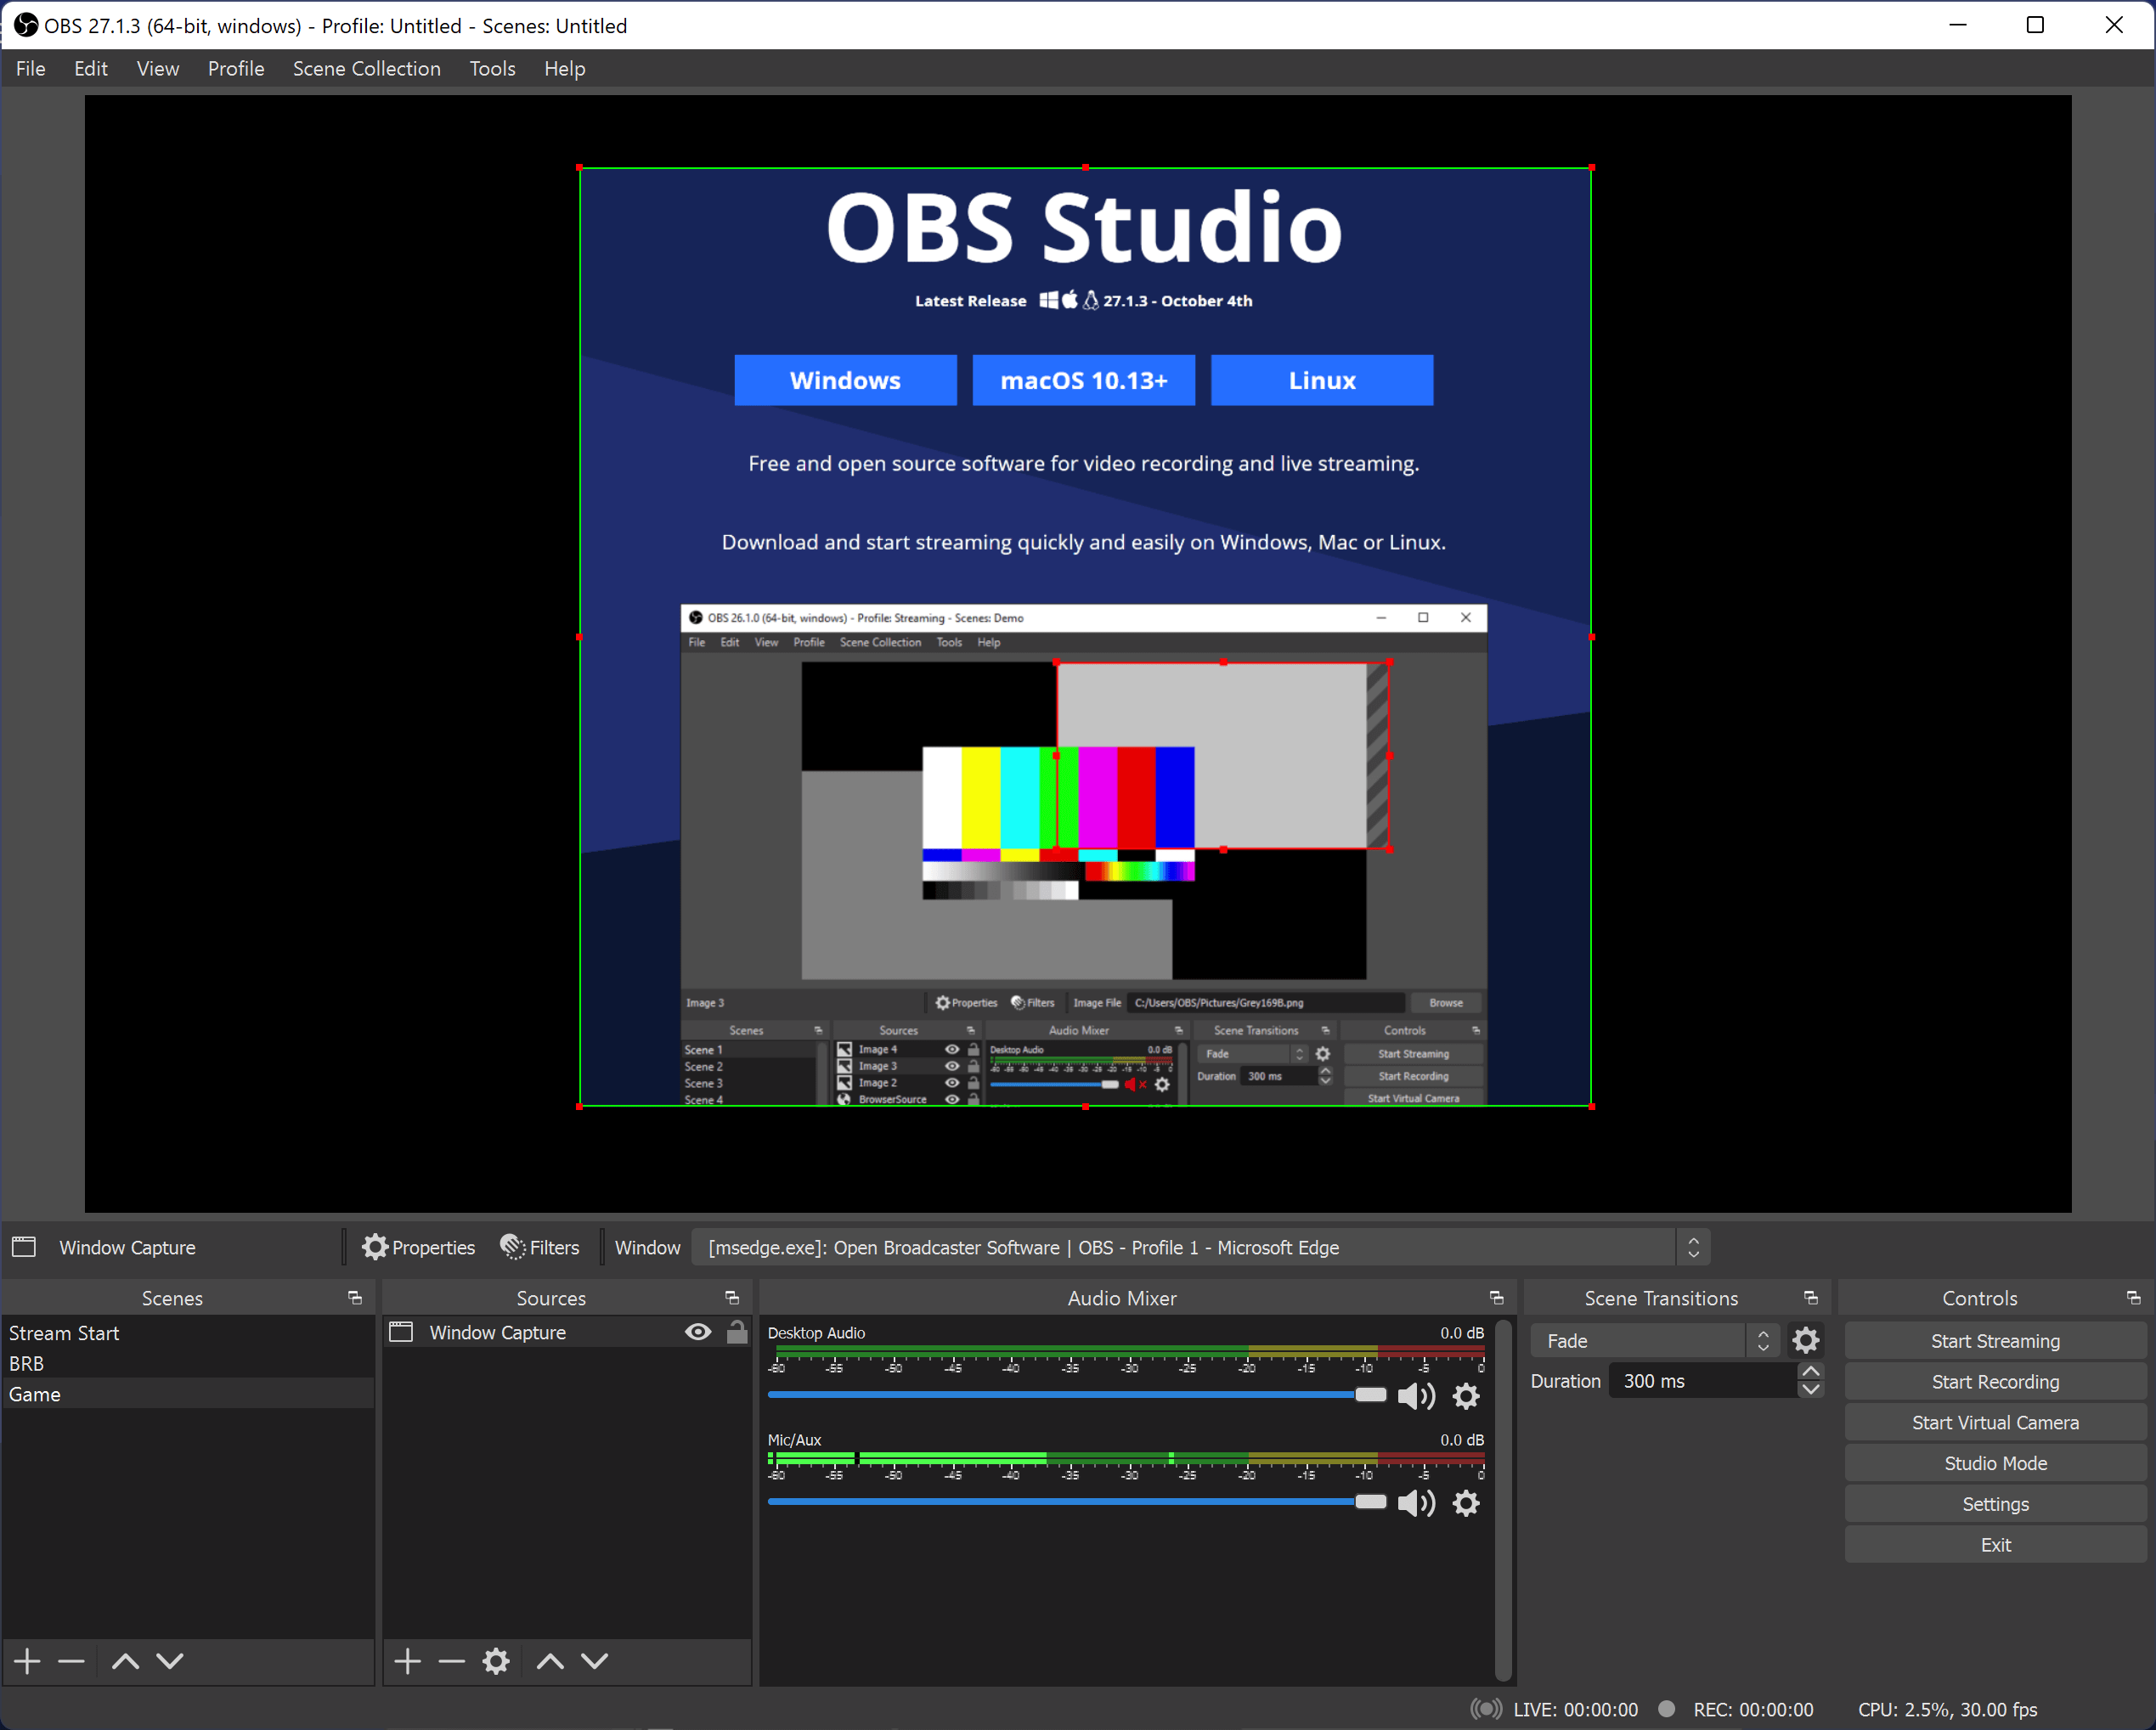
Scenes and Sources are the meat of OBS Studio. These are where you set up your stream layout, add your games, webcams, and any other devices or media that you want in the output.

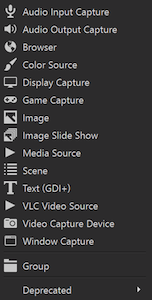
Capture audio, including microphones, desktop audio, and application audio |

Add a web page to your scene. This is primarily used for stream alert overlays and chat boxes |

Add a block of colour to a scene |

Capture an entire display on Windows, Linux, and macOS 12.6 and prior. On macOS 13, use macOS Screen Capture |

Capture hardware-accelerated games with high performance (Windows only; on other platforms, use a Display, Window, or macOS Screen Capture Source |

Add an image, or slideshow of images, to a scene |
|
Capture a display, window, or application — including desktop audio (macOS 13 and later) |

Add audio/video files to a scene. If VLC Media Player is installed, add a playlist |

Add customisable text to a source, including from a text file |

Capture a webcam, capture card, or other video device (including Blackmagic) |
Capture a single window from your display on Windows, Linux, and macOS 12.6 and prior. On macOS 13, use macOS Screen Capture |
Adding/Removing Sources
To add a Source, click on the + button at the bottom of the Sources dock (figure 1.1). From the Add Sources list (figure 1.2), you can choose a Source to add to your scene.
Whether it's a specific window, a capture card or game, image, text or your entire display that you want to capture, there are several different sources available in OBS Studio for you to choose from. Try them out!
To remove a Source, select the Source in the Sources dock and click the - button.

|
|
Ordering Sources
Sources that are above others in the Sources list (Figure 1.1) are also located above other Sources in the preview. You can re-align sources in the preview and change their order by using drag and drop in the list, or using the up and down arrow buttons.
A Source that is listed above another Source in the list will be on top and might hide what's beneath it. This can also be useful for situations where you want something on top of another source, like a webcam to show over your game play.
Hiding/Showing Sources
To hide a Source temporarily, you can click the eye icon to hide the associated Source with it; the eye will become greyed out.
To show the Source again, click the eye another time; the eye will become white.

|

|
Positioning and Sizing Sources

When a Source is selected in the Sources list, you will see a red box that shows up around it (Figure 3.1). This is the bounding box, and can be used to position sources within the preview as well as make the source larger or smaller.
Drag Sources around to position them within the Scene. Drag the red drag handles on the corners and edges of the Source to resize it to the desired size.
To place and size Sources with the greatest accuracy, use the Edit Transform window (figure 3.2): click on the Source, then click the Edit menu → Transform → Edit Transform… (Ctrl-E/Cmd-E). There are also options available in the Transform list (figure 3.3).
Advanced Sizing
To show only part of a Source, you can crop it to the part of the image you wish to show.
You can crop a Source using the Edit Transform window (Figure 3.1) or by holding the Alt/Option key and dragging the bounding box's drag handles. The edges will change to green to show it's being cropped. You can see both techniques being used in Figure 3.4 above to crop and enlarge only the part of the screen we want to show.
Hotkeys
The following Hotkeys are available in the preview to tweak the source position and size:
| Function | Windows | macOS |
|---|---|---|
| Edit Transform | Ctrl-E | Cmd-E |
| Reset Transform | Ctrl-R | Cmd-R |
| Fit to Screen | Ctrl-F | Cmd-F |
| Stretch to Screen | Ctrl-S | Cmd-S |
| Center to Screen | Ctrl-D | Cmd-D |
| Crop | Hold Alt and drag the bounding box | Hold Option and drag the bounding box |
| Disable Source/Edge snapping | Hold Ctrl | Hold Cmd |