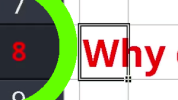
1:1 pixelsharp, 1:1 color, part of screen, not easy to configure ...

newbie-02

New Member
hello @ all,
can assume question has already been discussed, alas didn't find it ( newbie ).
My helpless attempts in screen recording suffer from aliasing, limited colors,
different codecs ... the hell ...
I'd like to be able to record part of the screen, and:
- get pixelsharp 1:1 video, e.g. recording a 1280x720 area of a 1920x1080 screen
and have 1280x720 output pixels 1:1 as had been on screen ... 'lossless'.
- in same manner get lossless color forwarding screen -> obs -> media player
( preferred VCL ).
And found no 'newbie-howto', stumble through preview scaling, windows too
wide, codecs ... I'm lost. Is there a simple help available anywhere?
In a further step I'd like to be able to perform a clean 2:1 downscaling, record e.g.
2560x1440 area of a hidpi screen, and apply a simple 4px -> 1px compression
to produce 1280x720 output. But first would need to get above steps working
without becoming a victim of well-meaning but disruptive 'improvement attempts'.

TIA for any hints ... b.
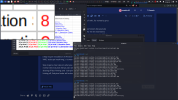
 

newbie-02

New Member
Gathered some insight, will try to collect it here as sort of 'wiki', for review by pros
and help for others who'd like to achieve similar.

Target is to produce a recording which uploaded to video hosters like youtube
will provide good readability. There will be other ways, for me it's essential to
have access to any single step to avoid mixup of optimizations where it's difficult
to understand or judge the final result.

Step 1.) Learn magnifying your screen, in Kali Linux with XFCE desktop I found two
options:
Screen zoom by a selectable control key and mouse scroll or two finger
scrolling on touchpad. Settings Manager - Window Manager Tweaks - Accessibility -
select control key, alas any is conflicting with scrolling in one or other application.
( May require installation of Window Manager Tweaks )
VMG, 'sudo apt install vmg', a 'screen lens'.

Step 2.) Learn about your source, get a clear view on what you want to record,
a source which is like pic_01 in normal view ( a ~25 percent window on a 4k screen ):
pic_01_standard_view.png


may look like pic_02 in detail / enlarged ( with default font anti-aliasing ), note the yellow / blueish colored seams:

pic_02_standard_magnified.png


or pic_03 ( anti-aliasing off ):
pic_03_anti-aliasing_off.png


or pic_04 ( anti aliasing on, hinting off, Sub-Pixel Order still active ):
pic_04_AA-on_hint-off_SPO-rgb.png


or pic_05 ( Sub-Pixel Order also 'none' ), note that the anti-aliasing is performed without color messup:
pic_05_AA-on_hint-off_SPO-none.png


set anti aliasing in Settings Manager - Appearance - Fonts, annoying is that it requires to log out and back in to activate changes ...
 

Attachments

  • pic_02_standard_magnified.png
    pic_02_standard_magnified.png
    871.1 KB · Views: 5

newbie-02

New Member
Step 3.) is to understand the production process, where I'm just guessing,
evtl. pro's can help or correct.
At the start we have a font, for which a set of optimizations are available
and can be steered by the user or programmer.
Abou that pls. read the article The Ails Of Typographic Anti-Aliasing by
Tom Giannattasio to learn how the options work together. My main concern
why I'd start this thread and write this stuff was the switch on and off of
AA ( Anti-Aliasing ), and the colored seams which I couldn't get rid off.
In further steps, after the first recording, we normally don't have fonts,
but a big matrix of pixels and color values assigned, compressed with various
methods, often by first coding a 'keyframe', and for subsequent frames
only deliver changes to the previous frame.
That has total different effect on standstill text vs. high motion games
with shaded areas, most procedures are optimized for gamers, thus info
and help for 'texters' is rare.

The above means that at the beginning of the process we have to make
decisions about font, size, properties such as italics / bold and 'anti-aliasing'
and its subtypes that cannot be easily changed later, if at all.

And typically new producers don't know which tool and settings they are
going to use have which consequences, start experimenting and after short
time come to unwanted - blurry - videos, where they don't know where to
improve.

For me it was between this, of course looking better if not magnified but
I didn't like it:
video_recorded_5.png


and this, after some time and lots of experiments, better!, but I still didn't want the intensified
seaming around the letters.
video_recorded.png


It was just not steered / intended by me, and I suspect it to waste processing power for things which
might help for other situations, but not for my target.

In my system the details of AA can only be steered by 'Apperance' settings and log out / in again, while to
switch it on or off in total I managed by setting:
<match target="font">
<edit name="antialias" mode="assign">
<bool>true</bool>
</edit>
in ~/.config/fontconfig/fonts.conf .
 

Attachments

  • video_recorded.png
    video_recorded.png
    71.8 KB · Views: 2
  • video_recorded.png
    video_recorded.png
    71.8 KB · Views: 2

newbie-02

New Member
Ok, with Anti-Aliasing off I can get clear if somewhat ugly pictures, with on but
Sub-Pixel Ordering 'none' I can get smoothed corners without falsifying colors.
Now I want to get that recorded and run into the next issue, bad pixeling, see:
pic_07_nv12_recording.png


the black pixels look ok, but the colors in the red 8 are blurred. For a newbie that's irritating,
and it took me some time to figure out.

The point is 'encoding' or 'chroma subsampling', to save space and time the encoding doesn't
store three colors, but 'darkness' ( Y channel ) and two colors blue ( Cb channel ) and red ( Cr channel ).
But - mostly - the latter two with reduced resolution. More info in: Chroma Subsampling – 4:4:4 vs 4:2:2 vs 4:2:0,
Einfluss von Chroma Subsampling auf die wahrgenommene Bildqualität bei verschiedenen Kategorien von Bildern,
and many similar sites.

I don't want any glitches like this so early in the process, I've been told youtube, for example, will automatically change to this format later. I think that will have to be enough, before that I would like to work with clear data, also to see if other steps introduce blurring. For this reason I use I444 encoding for the time being ( in OBS Settings - Advanced - Video - Color Format ).
 

newbie-02

New Member
One mistake I stumbled into: I was watching videos created at a lower resolution on a 4k screen fullscreen, and it was frayed. Like this example:
pic_09_fullscreen.png

My mistake, the content of the file looks like this - played in a sensitively adapted smaller window and then enlarged:
pic_10_1920window.png


Above requires absolutely exact adaption of the replay window to the source size, I finally succeeded by using another window as ruler like in:
pic_11_ruler.png


source left, replay right, in the upper and lower region of both windows.

The playback program - VLC - has (had) its own ideas on how to enlarge an image, and simply doubling a pixel in height and width is not one of them.

To take along: I have not yet found a recording mode or post-processing that simply enlarges 1 px -> 4 px or reduces 4 px -> 1 px :-(
I found notes about 'integer scaling' for images, but nothing that works in obs.

The only thing that works - so far - for me to create a 1920x1080 video on a 4k system is: Settings - Video - Base ( Canvas ) and Output to 3840x2160, in the preview window ctrl-F to fit selection to frame, then set Base ( Canvas ) and Output to 1920x1080.

There is more to say about the player, to have a hand on what's in recordings you may want to install and use 'mediainfo', as far as I remember 'sudo apt install mediainfo'.
 

newbie-02

New Member
hello @ Tuna, thanks for help, sounds like something I'd like to have,
but in Source - Screen Capture - right click - Scale Filtering
I have only 'Disable / Point / Bilinear / Bicubic / Lanczos / Area' to choose from.
 

Johnmelody7

New Member
Oh, man, dealing with pixel sharpness and color issues in OBS? That’s like trying to tune in the perfect frequency, y’know? I get it, you want everything to look crisp and clear, like the universe in high definition. If your screen’s a little off, it might just be a matter of fine-tuning those settings. Maybe check out the scaling or filtering options in OBS, like tweaking the resolution settings or playing around with the color correction filter. Sometimes, it’s all about finding the right balance, man. Keep it smooth, keep it natural, and you’ll get that sharp, vibrant look you’re vibing for. Peace and clarity to your stream, my friend!
 
Top